
Author: Brad
August and September Events
Last month, I dove into the world of in-person sales by running a booth at the Steel Days celebration in American Fork, Utah. I sold a few photographic prints and learned a lot about being a vendor at shows and fairs. I have signed up for two more shows in August, and one in September.
Alpine Days Carnival & Boutique
My first booth will be Saturday, August 14th, at the Alpine Days Carnival & Boutique. The boutique is at Creekside Park, 100 South and 600 East, in Alpine, Utah. Vendor booths will be open from 11:00 am to 8:30 pm.
Americana Arts & Music Festival
On Saturday, August 28th, I will have a booth at the Americana Arts & Music Festival. The festival will be at Robinson Park, 100 East Main, in American Fork, Utah. It will be open from 10:00 am to 9:00 pm.
Holy Cow Fall Boutique
At the end of September, I will be involved in the Holy Cow Fall Boutique. The Holy Cow boutique is different that the others in that I will not be there in person. Vendors sign up for a booth space and all purchases are made at a central checkout. If you wish to meet me or talk to me about my work, you will want to attend one of my August events.
The Holy Cow Fall Boutique runs Tuesday through Saturday, September 21st through 25th at the Lindon Community Center, 25 North Main, in Lindon, Utah. The boutique is open from 9:00 am to 9:00 pm, Tuesday through Friday, and 9:00 am to 7:00 pm, Saturday.

Come visit my booth at one of these events!
Digital Art NFTs Now For Sale!
About a month ago, I jumped on the NFT bandwagon and launched my own NFT collection on the digital marketplace OpenSea. For the moment, the NFTs listed for sale are older pieces of my digital artwork, many of which have never been published or displayed outside of my account on DeviantArt. A few have not even been seen there.
Unless you’ve been living under a rock or avoiding the Internet, you’ve probably heard of NFTs by now. NFTs, or non-fungible tokens, are unique digital identifiers, essentially secure metadata, which prove ownership of the digital ‘original’ of a piece or art or other object.
Owning an NFT is like owning an original painting or sculpture. The buyer of the painting may own the original canvas, but the painter retains full copyright of the painting and has the right to make and sell prints of his or her painting. In the same way, buyers of NFTs own the ‘original’ artwork, but the creator of the artwork maintains ownership of the copyright to his or her art.
I plan to continue adding NFTs of my art and photography to my NFT collection on OpenSea, so check in often to purchase your favorite pieces.
Painting the Manti Temple
I have little formal training in painting, so most of what I know I learned from articles on the Internet. I have been reading about imprimatura in painting and I wanted to try it out.
Imprimatura is an underpainting process where the painter creates a monochromatic stain of color on the canvas and uses the color to establish values of dark and light. Usually an earth tone is used, such as raw sienna or burnt umber. When painting, the artist is careful to not completely cover the imprimatura with paint so that some of the earth color shows through in the final painting.
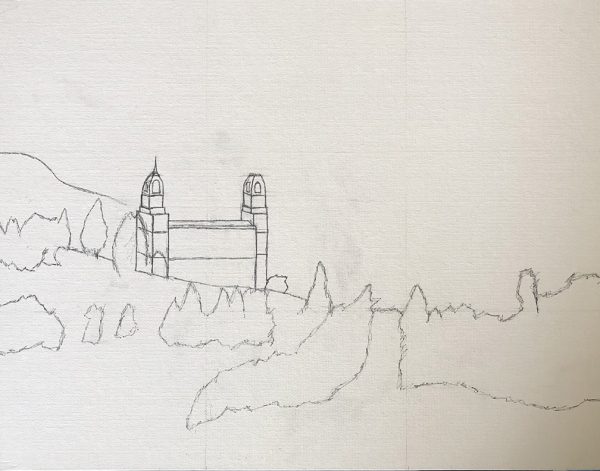
Once I had decided on my subject, I began my painting by creating a basic sketch on my canvas board with a pencil. I then traced my sketch with ink so that the lines would show through when I put down my imprimatura layer.
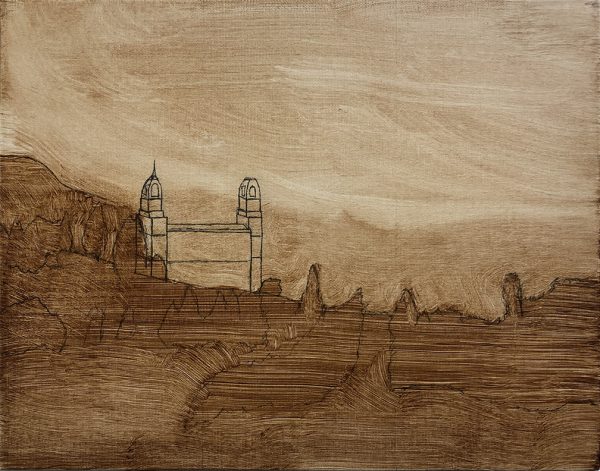
I created my imprimatura layer by mixing water and acrylic paint at close to a 1:1 ratio. I then used a foam brush from the hardware store to spread the thinned paint onto my canvas board. In retrospect, a foam brush was not the best tool for the job because it caused streaks in the paint. After brushing on my imprimatura layer, I used a paper towel to wipe the sky out so that the paint would be lighter in that area.
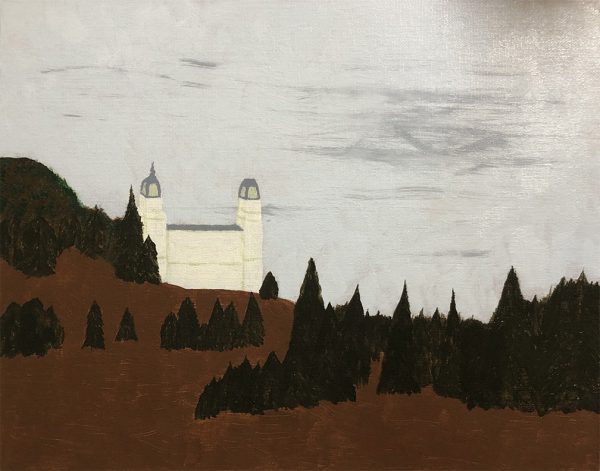
Once the imprimatura layer was dry, I began by painting the sky and the temple. I found another use for my foam brush while painting the sky. I found that if I put tiny drops of paint on the sky, I could use the foam brush to create cloud streaks. There are probably other ways to do this, but I really liked the way the streaks looked when using the foam brush.
When the sky and temple dried, I painted in a brown foreground and added dark green trees.
To finish off the painting, I lightly painted over the trees with a lighter green color to give some depth. I also lightly painted over the ground with a light green color, allowing some fo the brown to continue to show through.
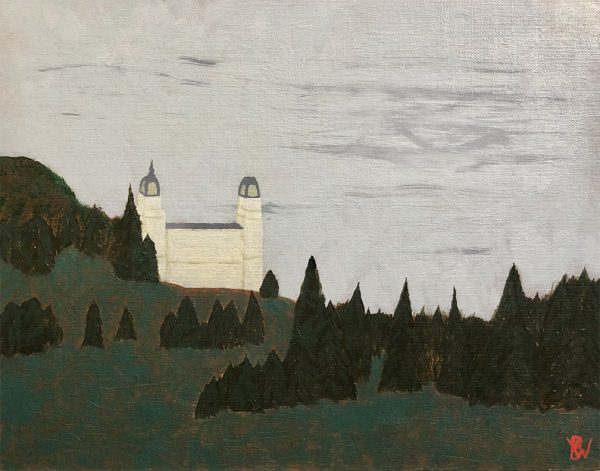
And that’s how I used imprimatura to create this painting. Did I use the technique correctly? I have no idea, but experimentation and creativity is what art is really about anyway.
New Game and New Gate
A couple of weeks ago, I started working on a new game. It’s called Forgotten Temple. Forgotten Temple is sort of a reimagining of Treasure Tomb, but it’s also more than that. It’s closer to my original concept for Treasure Tomb; sort of what Treasure Tomb was supposed to be but I couldn’t bring it all together at the time.
Don’t get me wrong, I’m mostly happy with how Treasure Tomb turned out and I was able to re-use some of the original ideas for Wolf in the Fold, but it was nice to be able to put everything back together.
Forgotten Temple follows a similar theme to Treasure Tomb, except now when a player enters the temple/tomb he or she encounters a mummified priest. Also, players no longer collect gold to win the game. The basic object of the game is to steal a treasure token from the mummy-priest and exit the temple still holding the treasure.
The basic concept of the cards from Treasure Tomb is also completely redesigned. Cards only serve 3 purposes now:
- Move a player’s pawn
- Move the mummy-priest
- Unlock an entrance to the temple
I’ve kept the concept of building passages inside the temple, but the tiles are all hex tiles now instead of square tiles. The tiles are also thicker; they are actual tiles instead of cards. Both of these changes should help the game board hold together better, and the hex tiles were what I originally wanted, as evidenced by the hex tiles in Wolf in the Fold.
I’m hoping to begin playtesting in a couple of weeks and barring any major changes I will be begin working on the final artwork within the next month or two.
In other news, my fence has been falling apart for a couple of years. I finally took the time this morning to replace the smaller section on one side of my house with a gate. I’ve never built a fence before, so the 4-foot wide gate was my test. I like how it turned out, so now I guess I need to man-up and rebuild the 15-foot section on the other side of the house.
I built the gate to swing inward with no exterior features, so unless you know it’s a gate it just looks like a normal section of fence.
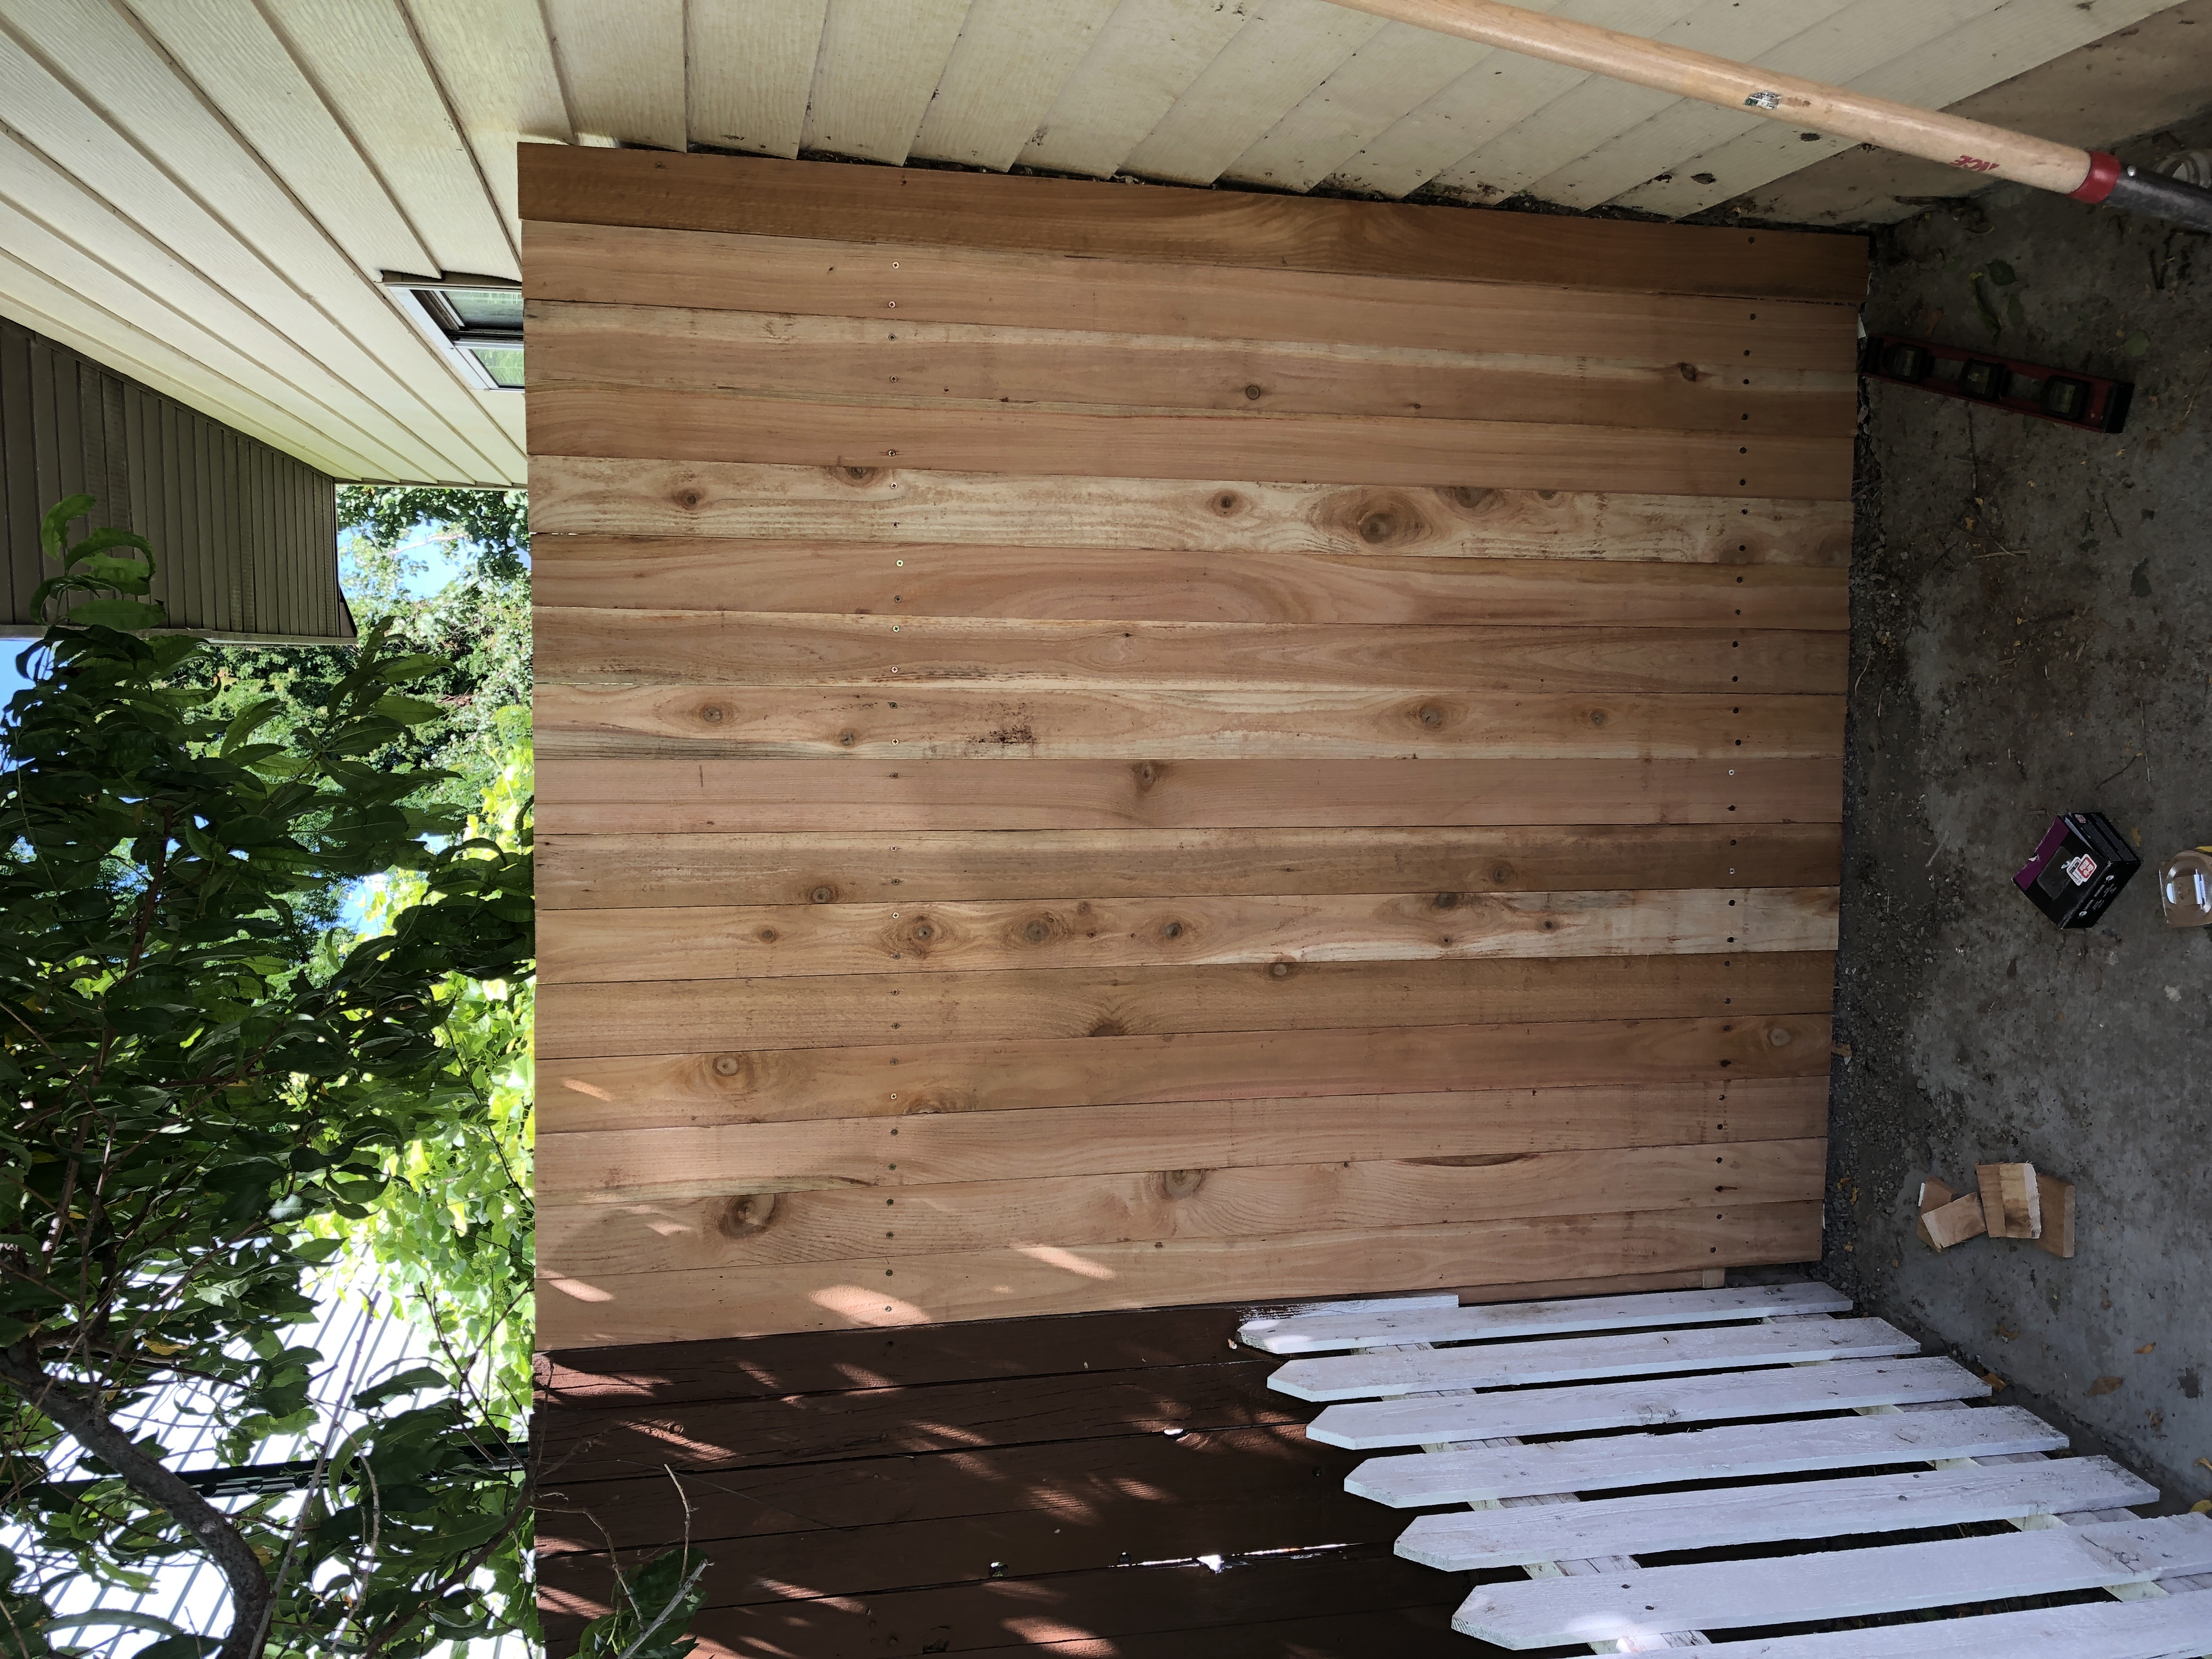
Now I just need to buy some paint or stain to finish it off.
New Artistic Imposter Design Newsletter
Almost a decade ago, I wrote a series of monthly newsletters for Artistic Imposter Design, but I gave up on them after about six months. Well, I’m pleased to announce that I’ve restarted my monthly newsletters, and the first one was emailed out this morning. If you missed it, here is the link to the online version: https://mailchi.mp/d18fbd19d766/artistic-imposter-design-november-2019-newsletter.
Subscribe now to make sure you don’t miss another one!
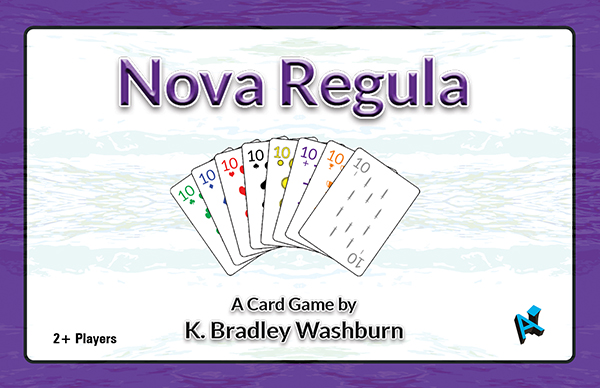
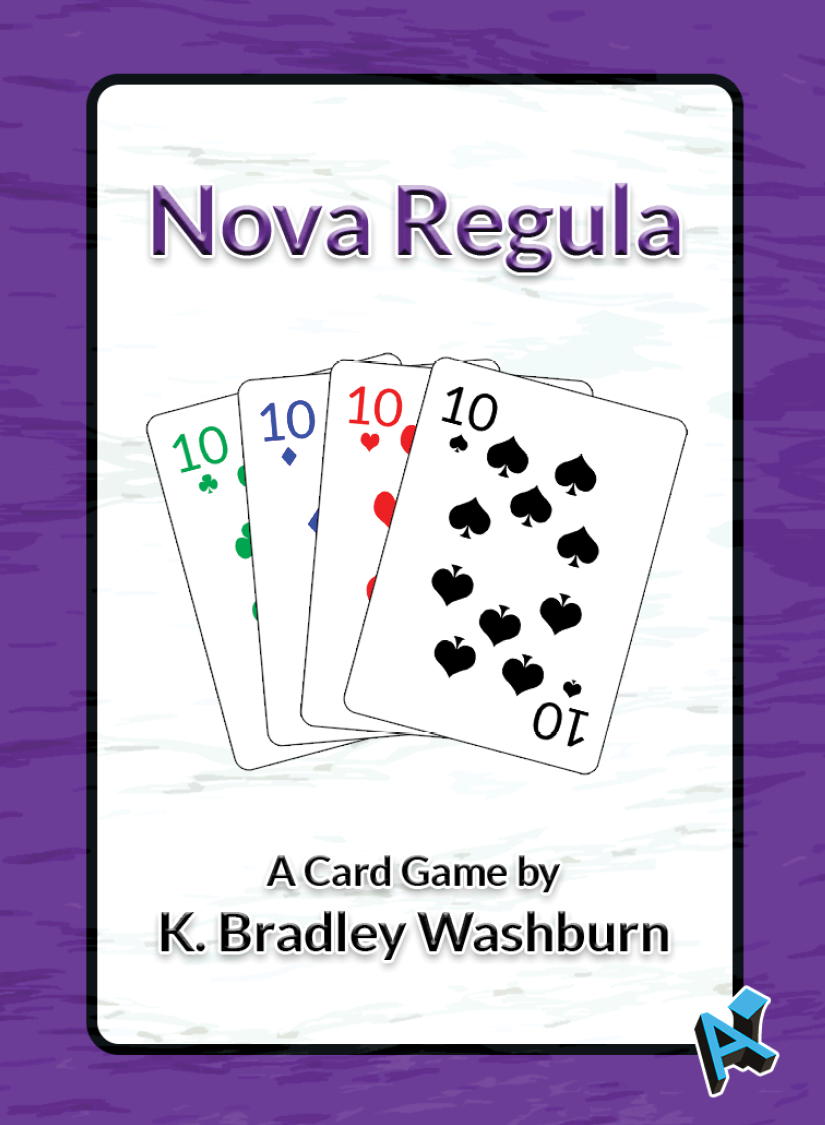
Nova Regula On Sale Now!
Last year, I wrote about a new game I was working on, Nova Regula. After several rounds of playtesting, a couple of modifications to the original rules, and way too much time sitting on the back burner, I have finally listed the game for sale at The Game Crafter. While you’re there, be sure to check out the Nova Regula Expansion Set, also available now!
Nova Regula is a classic card game with one twist – the rules are always changing. Players take turns playing cards into the pot. If you can’t play a regular card, play an event card instead. Some event cards change the rules, but beware – the change may not be in your favor!
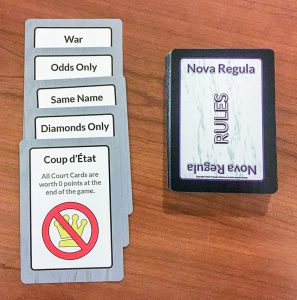
Includes a custom deck of 54 classic playing cards, 20 Event cards, and 30 Rules cards.
Available Now at The Game Crafter!
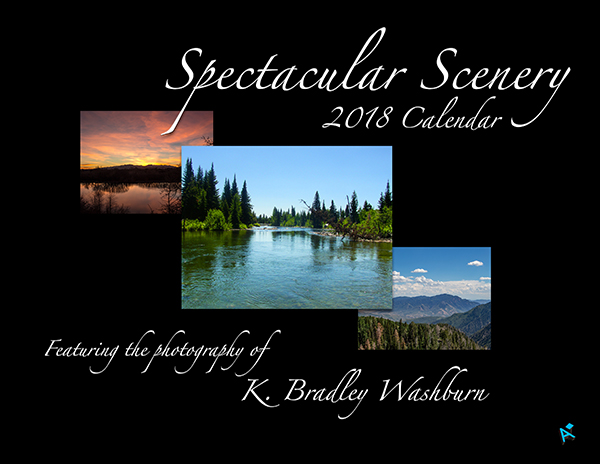
Spectacular Scenery 2018 Calendar Available for Purchase!
Still looking for that perfect wall calendar for next year? Look no further! My new Spectacular Scenery 2018 Calendar, featuring twelve of my best landscape photography prints, is available now for purchase from DeviantArt.
Each photograph in this calendar is also available as an individual print in various sizes. Photographs included in this calendar are:
Shelter Cove (2015)
View South from Mt. Konocti (2015)
Sunset at Highland Glen (2017)
Cottonwood Creek (2006)
Down By the Creek (2016)
Bonneville Salt Flats (2015)
Nebo Loop in July (2016)
Cabin in the Tetons (2006)
Field of Hay Bales (2016)
View From Scotts Bluff (2016)
Distant Mountains (2016)
Cleveland Reservoir Panorama (2015)
Visit DeviantArt now to get your copy!
New Game in the Works
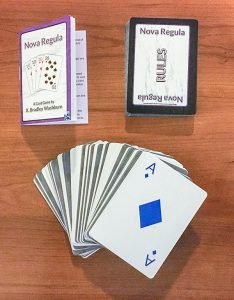
Over the last couple of weeks, I have dedicated some of my free time to working on a new card game, Nova Regula. Based on several classic card games, Nova Regula is designed to be easy to learn for even the most casual gamer.
Nova Regula utilizes a custom deck of 54 playing cards, 20 Event cards, and 30 Rules cards. Nova Regula follows the usual method of playing cards to the middle of the table, with one twist – the rules are always changing.
I have completed the game prototype and expect to begin playtesting soon. I plan to put the game up for sale in the next month or so, but in the meantime you can check out the product page at The Game Crafter.
Creating a Stereographic Projection in Photoshop
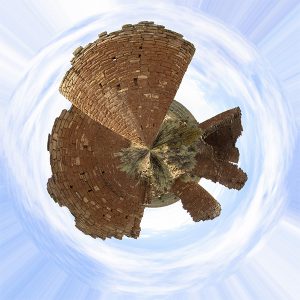
Several years ago, I came across a way to create cool and unique pieces of art from a photograph in Photoshop. This type of photograph is known as a stereographic projection or “little planet” and, while you don’t see too many people doing it anymore, it seems like it was kind of popular a few years ago. I made a few of these back then, and since I’ve always liked them I’ve recently started making them again.
To make this kind of art is actually pretty simple and requires only a couple of things: a great photograph and a copy of Adobe Photoshop or a similar image-editing program. The best stereographic projections use a type of picture called a 360-degree panorama. This means that the edge of one side of the panorama could be placed next to the opposite edge of the panorama and the two sides would form a continuous scene. These types of pictures are often created by standing in one place and taking continuous photographs while panning the camera in a 360-degree circle, then stitching the photos together in Photoshop or a similar program. Many smartphone cameras now have a panorama feature that makes this easier.
So what do you do if you can’t get a 360-degree panoramic photograph? There are two options: either fake it by editing the image you have, or mirror the image. I have done both, and both options can provide great results.
Faking It
First, I want to show you how to fake it. I’ll use a copy of my photograph, Hovenweep, taken at Hovenweep National Monument.
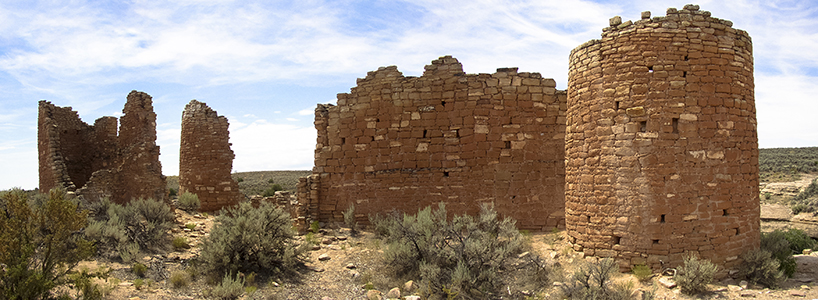
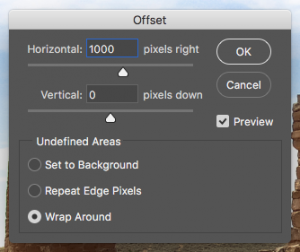
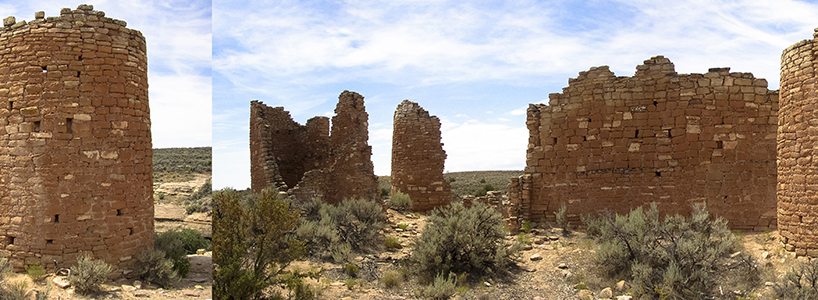
After opening the photograph in Photoshop, I will go to the “Filter” menu, scroll down to “Other,” and choose “Offset…” from the pop-out menu. In the “Horizontal” text field in the dialog box that pops up, I will type “1000” and click the “OK” button. My image will now look like this:
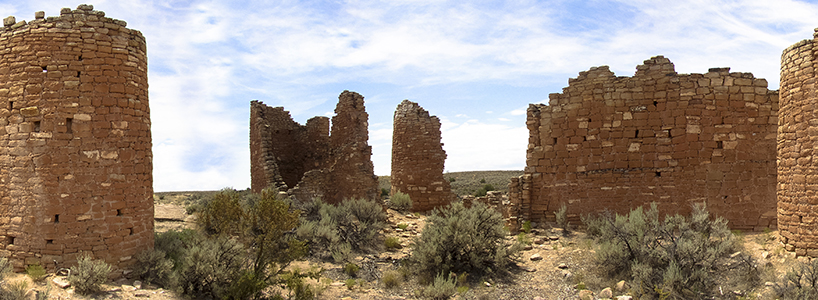
I can now use the Clone Stamp tool to replace areas of the image along the seam so that the offset sides flow into each other without a noticeable difference. Since we are creating a stereographic projection the seam doesn’t have to be perfect, but I will still make it look really good. Once I am finished with that, my image will look like this:
You can still see a couple of places where I could have tried to make it look better, but it will be fine in the final result. Now that I have erased the seam, I will go to the “Image” menu, scroll down to “Image Rotation,” and choose “180°.” Back in the “Filter” menu, I will scroll down to “Distort,” and choose “Polar Coordinates…” In the dialog box, make sure the “Rectangluar to Polar” radio button in selected and click “OK.” My image will now look like this:
The last step is to resize the image so that is a square. Some people do this step right after using the Clone Stamp tool, but I prefer to do it last. When I do it earlier in the process, I occasionally get weird artifacts in my final image. To complete this step, I will go to the “Image” menu again and choose “Image Size.” In the dialog box, I will make sure the “Resample” check box is selected and the link icon between Width and Height is not selected. I will choose “Pixels” from the drop down menu next to Width. Then I will change the value in the text box next to Width to match the value in the text box next to Height, and click “OK.”
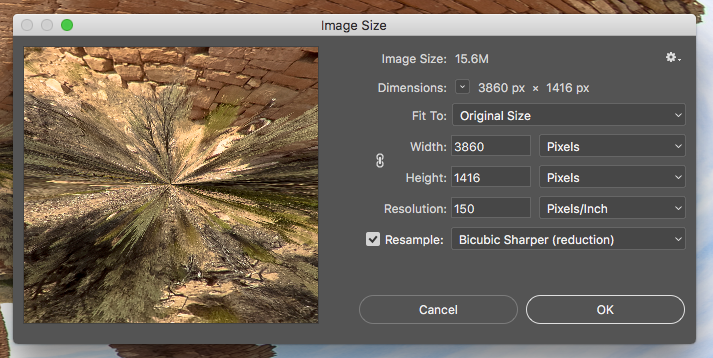
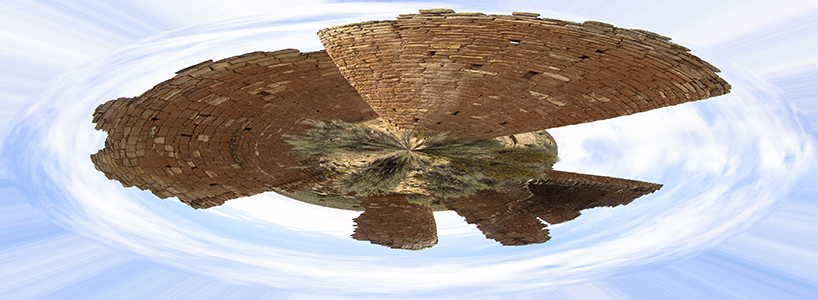
My final image looks like this:

Although not perfect, my seam is now not even visible. It’s a little different from my first version because the Offset value in my first version was different, but that’s how it’s done!
Mirroring
For this example, I will use a different image. I’ll open up a copy of my photograph Cottonwood Creek in Photoshop. The first thing I will do is go to the Layers panel, click the lock icon on the Background layer, right-click on the layer, and choose “Duplicate Layer.” I now have two layers, each with the Cottonwood Creek image.
From the “Image” menu, I will now choose “Canvas Size.” In the dropdown box next to Width, I will choose “Percent.” Then in the text field next to Width, I will change “100” to “200” and click “OK.” This will double the width of the canvas while keeping the height the same.
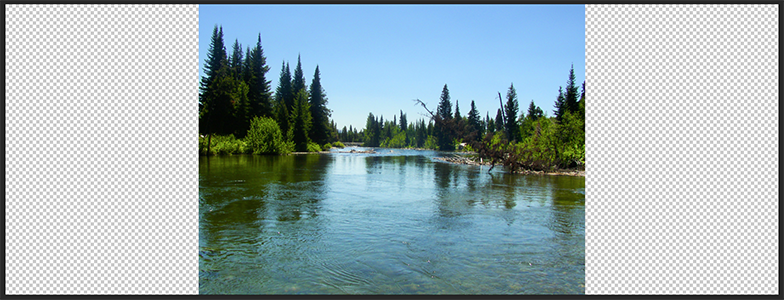
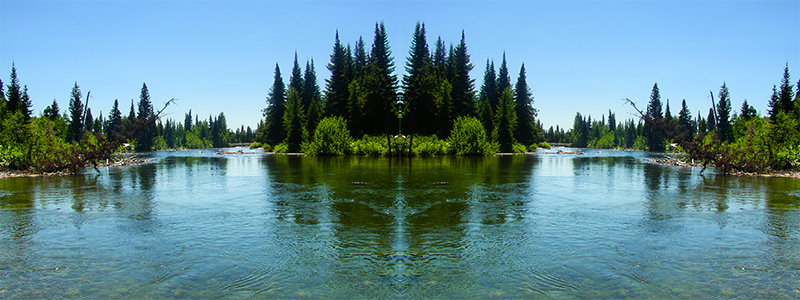
Using the Selection Tool, I will drag one layer clear to the right of the canvas and drag the other layer clear to the left of the canvas. Then, with just one layer selected, I will go the “Edit” menu, scroll down to “Transform,” and choose “Flip Horizontal.” This creates a mirrored landscape and my image now looks like this:
With the top layer selected, I will now press “CMD+E” (Mac) or “CTRL+E” (Windows) to merge the two layers, and follow the steps I took above to rotate the image, map to polar coordinates, and resize to a square. My final image will look like this:
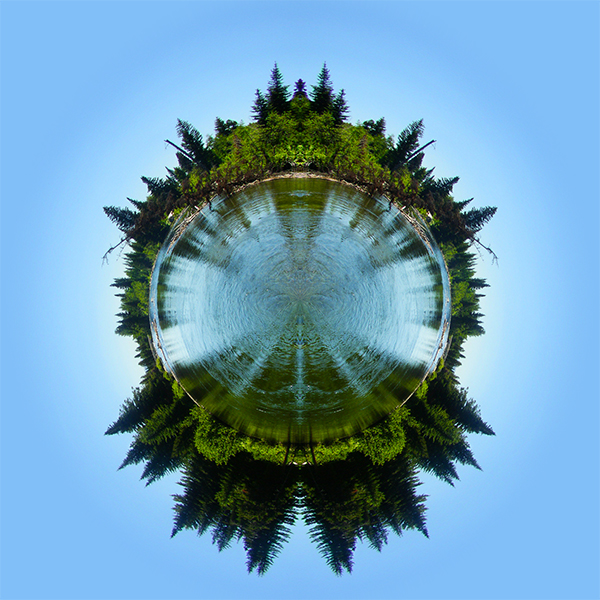
That’s all there is to it! With a nice photograph and a decent image-editing program anyone can create a stereographic projection.
DeviantArt and Fine Art America
A couple of months ago, I created a Deviant Art profile to begin showing off my artwork and photography, and hopefully to begin selling a little bit as well. Since then, I have added over 70 works of art and photographs to my profile, most of which can be purchased as either prints or art gifts. Check out the slideshow below to see some of these works:
Shortly after creating my DeviantArt profile, I also created an account with fineartamerica.com, where I have begun uploading only the photography and artwork which I consider to be the very best. I also have prints and other items available to purchase from my Fine Art America profile.