
Tag: Digital art
Digital Art NFTs Now For Sale!
About a month ago, I jumped on the NFT bandwagon and launched my own NFT collection on the digital marketplace OpenSea. For the moment, the NFTs listed for sale are older pieces of my digital artwork, many of which have never been published or displayed outside of my account on DeviantArt. A few have not even been seen there.
Unless you’ve been living under a rock or avoiding the Internet, you’ve probably heard of NFTs by now. NFTs, or non-fungible tokens, are unique digital identifiers, essentially secure metadata, which prove ownership of the digital ‘original’ of a piece or art or other object.
Owning an NFT is like owning an original painting or sculpture. The buyer of the painting may own the original canvas, but the painter retains full copyright of the painting and has the right to make and sell prints of his or her painting. In the same way, buyers of NFTs own the ‘original’ artwork, but the creator of the artwork maintains ownership of the copyright to his or her art.
I plan to continue adding NFTs of my art and photography to my NFT collection on OpenSea, so check in often to purchase your favorite pieces.
Creating a Stereographic Projection in Photoshop
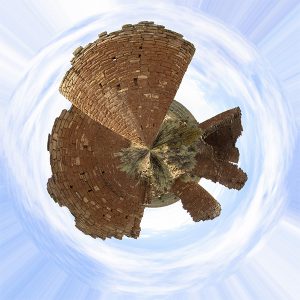
Several years ago, I came across a way to create cool and unique pieces of art from a photograph in Photoshop. This type of photograph is known as a stereographic projection or “little planet” and, while you don’t see too many people doing it anymore, it seems like it was kind of popular a few years ago. I made a few of these back then, and since I’ve always liked them I’ve recently started making them again.
To make this kind of art is actually pretty simple and requires only a couple of things: a great photograph and a copy of Adobe Photoshop or a similar image-editing program. The best stereographic projections use a type of picture called a 360-degree panorama. This means that the edge of one side of the panorama could be placed next to the opposite edge of the panorama and the two sides would form a continuous scene. These types of pictures are often created by standing in one place and taking continuous photographs while panning the camera in a 360-degree circle, then stitching the photos together in Photoshop or a similar program. Many smartphone cameras now have a panorama feature that makes this easier.
So what do you do if you can’t get a 360-degree panoramic photograph? There are two options: either fake it by editing the image you have, or mirror the image. I have done both, and both options can provide great results.
Faking It
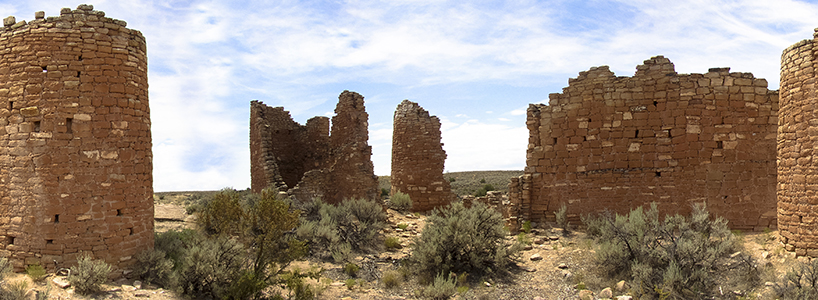
First, I want to show you how to fake it. I’ll use a copy of my photograph, Hovenweep, taken at Hovenweep National Monument.
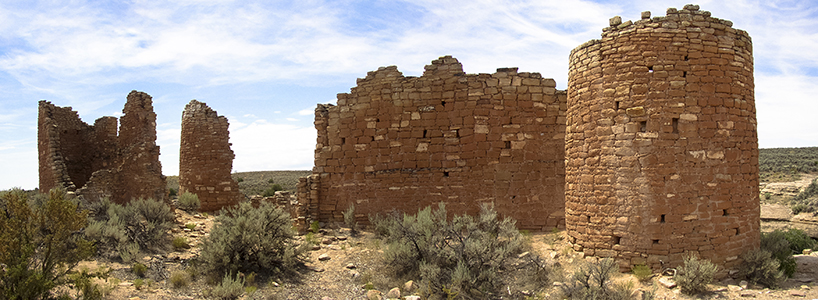
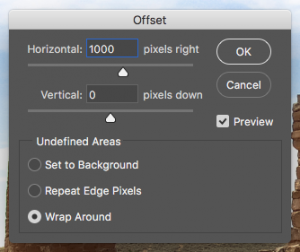
After opening the photograph in Photoshop, I will go to the “Filter” menu, scroll down to “Other,” and choose “Offset…” from the pop-out menu. In the “Horizontal” text field in the dialog box that pops up, I will type “1000” and click the “OK” button. My image will now look like this:
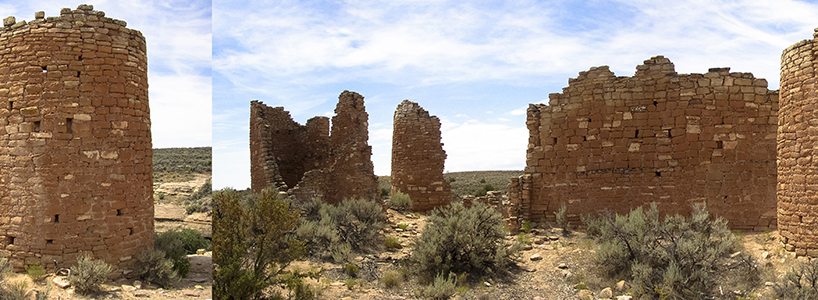
I can now use the Clone Stamp tool to replace areas of the image along the seam so that the offset sides flow into each other without a noticeable difference. Since we are creating a stereographic projection the seam doesn’t have to be perfect, but I will still make it look really good. Once I am finished with that, my image will look like this:
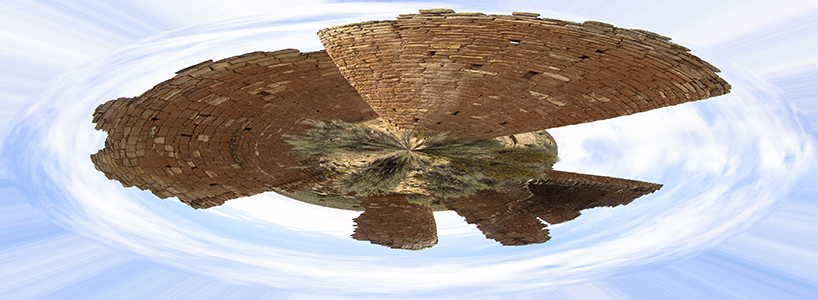
You can still see a couple of places where I could have tried to make it look better, but it will be fine in the final result. Now that I have erased the seam, I will go to the “Image” menu, scroll down to “Image Rotation,” and choose “180°.” Back in the “Filter” menu, I will scroll down to “Distort,” and choose “Polar Coordinates…” In the dialog box, make sure the “Rectangluar to Polar” radio button in selected and click “OK.” My image will now look like this:
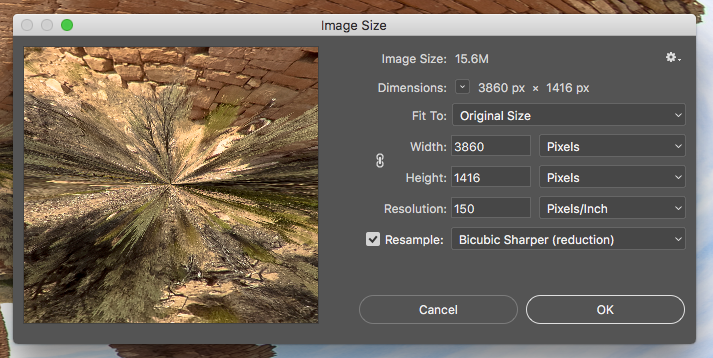
The last step is to resize the image so that is a square. Some people do this step right after using the Clone Stamp tool, but I prefer to do it last. When I do it earlier in the process, I occasionally get weird artifacts in my final image. To complete this step, I will go to the “Image” menu again and choose “Image Size.” In the dialog box, I will make sure the “Resample” check box is selected and the link icon between Width and Height is not selected. I will choose “Pixels” from the drop down menu next to Width. Then I will change the value in the text box next to Width to match the value in the text box next to Height, and click “OK.”
My final image looks like this:

Although not perfect, my seam is now not even visible. It’s a little different from my first version because the Offset value in my first version was different, but that’s how it’s done!
Mirroring
For this example, I will use a different image. I’ll open up a copy of my photograph Cottonwood Creek in Photoshop. The first thing I will do is go to the Layers panel, click the lock icon on the Background layer, right-click on the layer, and choose “Duplicate Layer.” I now have two layers, each with the Cottonwood Creek image.
From the “Image” menu, I will now choose “Canvas Size.” In the dropdown box next to Width, I will choose “Percent.” Then in the text field next to Width, I will change “100” to “200” and click “OK.” This will double the width of the canvas while keeping the height the same.
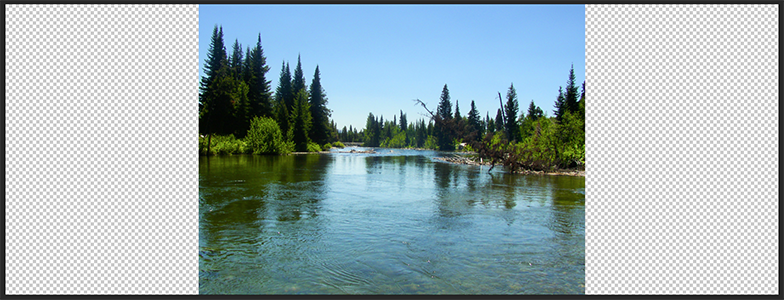
Using the Selection Tool, I will drag one layer clear to the right of the canvas and drag the other layer clear to the left of the canvas. Then, with just one layer selected, I will go the “Edit” menu, scroll down to “Transform,” and choose “Flip Horizontal.” This creates a mirrored landscape and my image now looks like this:
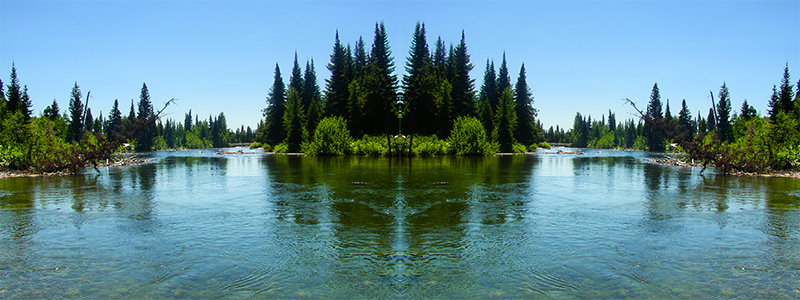
With the top layer selected, I will now press “CMD+E” (Mac) or “CTRL+E” (Windows) to merge the two layers, and follow the steps I took above to rotate the image, map to polar coordinates, and resize to a square. My final image will look like this:
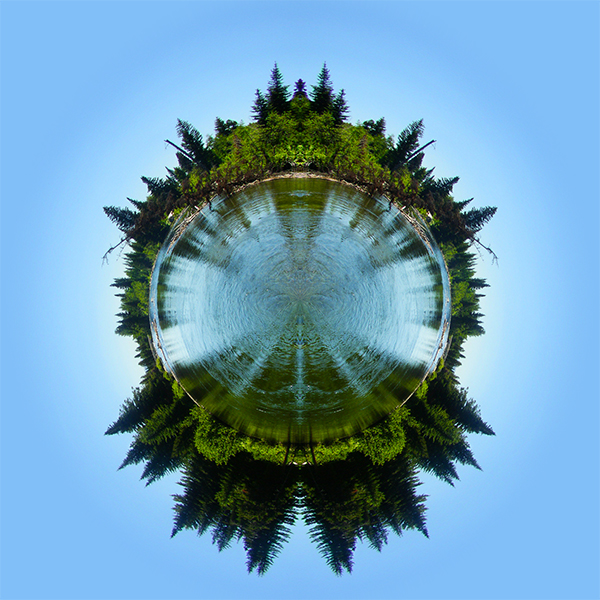
That’s all there is to it! With a nice photograph and a decent image-editing program anyone can create a stereographic projection.
Wolf Illustrations
I’ve been working on some illustrations for a game idea that has been bouncing around in my head for a while. They’re pretty simple, but that’s kind of the look I’m going for.
I’m not sure if they’re final yet or if I want to play around with them more. I still need to decide which one I like best, but I thought I’d share them out for your viewing pleasure.


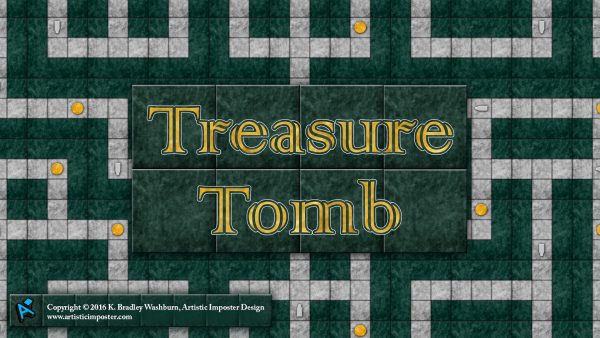
Free Treasure Tomb and Wolf In The Fold Computer Wallpaper
Last week, I decided to repurpose the game art from Treasure Tomb and Wolf In The Fold and turn the art into computer wallpaper.
The wallpaper is now available from my Online Store in three sizes each: 1600×1200 pixels, 1920×1080 pixels, and 2560×1440 pixels. While there are many other screen sizes I could have created, these three sizes can be effectively scaled for use on either a 16:9 or 4:3 computer monitor. Users with 4:3 monitors will want to download the 1600×1200 file, while 16:9 users should choose from either of the other two sizes.
Visit my online store and download your free wallpaper now:


LearnKey Blog Guest Post: Woman Turns Alien via Photoshop
A little while ago, I had the opportunity to write a guest post for LearnKey’s blog, and my post went online today. The post is about a picture I made a while back in Photoshop of an alien while following a tutorial online. We’re going to be filming the Adobe CS5 Suite, starting with Photoshop next week, so I was asked to write a little something showing an interesting way to use Photoshop. Check out my post at blog.learnkey.com/?p=789.
Daily Image – Day 13
Here is the image for today:

Daily Image – Day 12
Here is the image for today:

Daily Image – Day 11
Here is the daily image for today:

Daily Image – Day 10
Here is the image for today:

Daily Image – Days 8 & 9
I got so busy doing things yesterday, I forgot to post my daily image.
Here is the one that I should have posted yesterday:

Here is the one for today:
